Beginner Survival Tips for Gray Zone Warfare: How to Stop Dying and Start Progressing
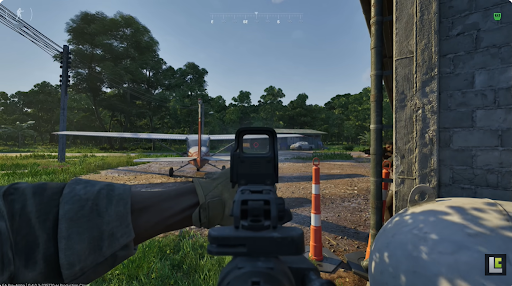
Gray Zone Warfare will punish you. Not eventually. Immediately.
Most new players load in, sprint toward the nearest building, and catch a bullet from an AI soldier they never saw. Then they do it again. And again. Sound familiar?
Here’s the thing. This isn’t Call of Duty. It’s not even Tarkov, really. Gray Zone Warfare is a PvE-first tactical extraction shooter set on Lamang Island, and it rewards patience over aggression every single time.
Since Update 0.4 “Spearhead” dropped in March 2026, the game essentially rebuilt itself from the ground up—new stealth mechanics, replayable tasks, overhauled AI, medical feedback changes. Over 126,000 daily active players flooded back in. Many of them are brand new.
This guide covers the survival fundamentals that veterans wish someone had told them on day one.
Start in Joint Operations. Seriously.
Gray Zone Warfare offers two main modes. Joint Operations is PvE. Warfare is PvPvE. Pick Joint Operations first.
The reasoning is simple. You need to learn how extraction works, how tasks function, and how the medical system can ruin your raid before you add hostile human players to the equation. Joint Ops lets you fail without the extra humiliation of getting clapped by a squad while you’re still figuring out your keybinds.
Once you’re comfortable navigating Lamang, completing tasks, and extracting consistently, Warfare becomes the natural next step.
Slow Down. Then Slow Down More.
The single most repeated piece of veteran advice across every Reddit thread, YouTube guide, and Discord server is this: play slowly.
“Slow is smooth, smooth is fast” isn’t just a military cliché here. It’s a survival strategy. The AI in Gray Zone Warfare flanks, suppresses, and shoots with genuinely scary accuracy. Sprint around a corner and you’re dead before your brain registers the muzzle flash.
Crouch. Use cover. Peek from different angles—never the same one twice. After Update 0.4.2.0, crouching and crawling through dense foliage dramatically lowers your detection chance. The stealth system actually works now, so use it.
And listen. Footsteps and door sounds give you reliable positional intel. Distant gunfire? Less useful. But that creak of a door fifteen meters away? That’s life-or-death information.
The Medical System Will Kill You If You Ignore It
This is where most beginners get wrecked without understanding why.
Your blood level is essentially your overall HP. Drop below roughly half and you’ll start blacking out—eventually entering a coma state that requires another player to revive you. Different injuries need different treatments. A bandage won’t fix a fracture. A tourniquet won’t treat organ damage.
Before every deployment, carry these:
- Bandages and tourniquets (for light and heavy bleeds)
- A splint (fractures)
- A surgery kit (serious wounds)
- At least one blood bag
- Food and water for stamina buffs
Veterans treat medical supplies like ammunition—non-negotiable. Skip them and even a minor firefight becomes a death sentence when you’re bleeding out with nothing in your inventory to stop it.
Tasks Are Your Progression Engine
Aimlessly roaming Lamang looking for fights is how you stay broke and under-geared forever.
Main Tasks are the fastest path to leveling your vendors, unlocking better equipment, and building a sustainable economy. Completing trader tasks increases your reputation with them, which unlocks higher-tier gear at better prices. Update 0.4 made tasks replayable, so failing an objective no longer feels catastrophic.
Contracts and side missions add income variety, but they shouldn’t distract from main task progression. Think of them as supplements, not replacements.
One critical detail: buying from traders also levels them up. Even small purchases contribute to your reputation. Keep that in mind when you’re deciding where to spend your cash.
Your Loadout Should Be Cheap, Not Cool
New players love bringing their best gear into easy tasks. Then they lose it and spiral.
Don’t do this. Budget loadouts are the move early on. M4 variants and scavenged AKs are everywhere in starter areas—practically free. Hollow point rounds handle unarmored AI perfectly. Save armor-piercing ammo for military bases and PvP encounters where enemies actually wear plates.
A practical early kit looks like this: a basic rifle, hollow point ammo, Level 3A armor, your medical essentials, and a pre-packed backpack ready to go. If you die, you redeploy in under a minute without emotional damage.
Strip optics off looted weapons and sell or reuse them. Stop hauling junk ammo and common food back to base. Prioritize keys, task items, and rare medical supplies in your secure container instead.
Learn the Map With Interactive Tools
Lamang Island is massive. Major POIs appear as you discover them, but minor ones stay hidden until you physically visit them. Walking through Landing Zones unlocks them for future deployments, so deliberately explore new LZs while completing nearby tasks.
Keep an interactive map open in your browser. Tools like GZW Tac Map and tcno.co’s map show task locations, key spawns, loot spots, and extraction points. Veterans don’t memorize everything from scratch—they reference these maps constantly until the routes become second nature.
Starter towns and surrounding areas feature lower-tier AI with lighter armor. Push deeper into jungle compounds and military bases only after you’re comfortable with combat fundamentals and carrying appropriate gear.
Situational Awareness Wins Fights
In Gray Zone Warfare, the player who spots first almost always wins. That’s true against AI and doubly true against other PMCs.
Grab a scope. Use it before entering any POI. Check windows, rooftops, treelines. AI patrols respawn roughly every fifteen minutes, so a location you cleared earlier might be occupied again.
When firefights happen, relocate after shooting. The AI tracks your last known position. Staying put while exchanging shots is how you get flanked and killed. Move laterally, re-engage from a fresh angle, and keep hard cover between you and the threat.
For players who want an extra edge in visibility and threat detection, tools like Gray zone aimbot by Battlelog offer ESP overlays and enhanced awareness features that complement the tactical skills covered in this guide.
Stop Making These Mistakes
A quick rundown of the habits that get beginners killed most often:
Rushing extractions. Calling a helicopter and sprinting into the open without scanning the area is an invitation to die at the finish line. Clear the LZ, call the heli, maintain cover, then board.
Ignoring weight. Overloaded kits drain stamina fast and make repositioning sluggish. If you can’t run away from a bad fight, you’re carrying too much.
Ego-pushing your body. You died and your gear is sitting on your corpse. The instinct is to sprint back immediately. Resist it. Gear is replaceable. Dying twice in the same spot is just compounding the loss.
Skipping the tutorial. Update 0.4 added a proper field manual and tutorial flow. Run through it before your first real deployment. Five minutes of reading saves hours of confusion.
The Bottom Line
Gray Zone Warfare doesn’t care about your reflexes or your K/D ratio. It cares about preparation, patience, and smart decisions under pressure.
Stock medical supplies. Run budget kits. Complete your tasks. Learn the map. Move slowly. And treat every death as a lesson rather than a failure.
The players who internalize these fundamentals early are the ones who stop dying pointlessly and start building real progression on Lamang. Everyone else keeps feeding the AI.